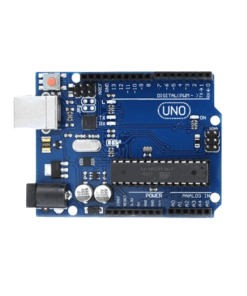
Arduino Uno R3 (CH9102 drive) – Standard Quality at an Affordable Price in Bangladesh
800.00৳ 700.00৳
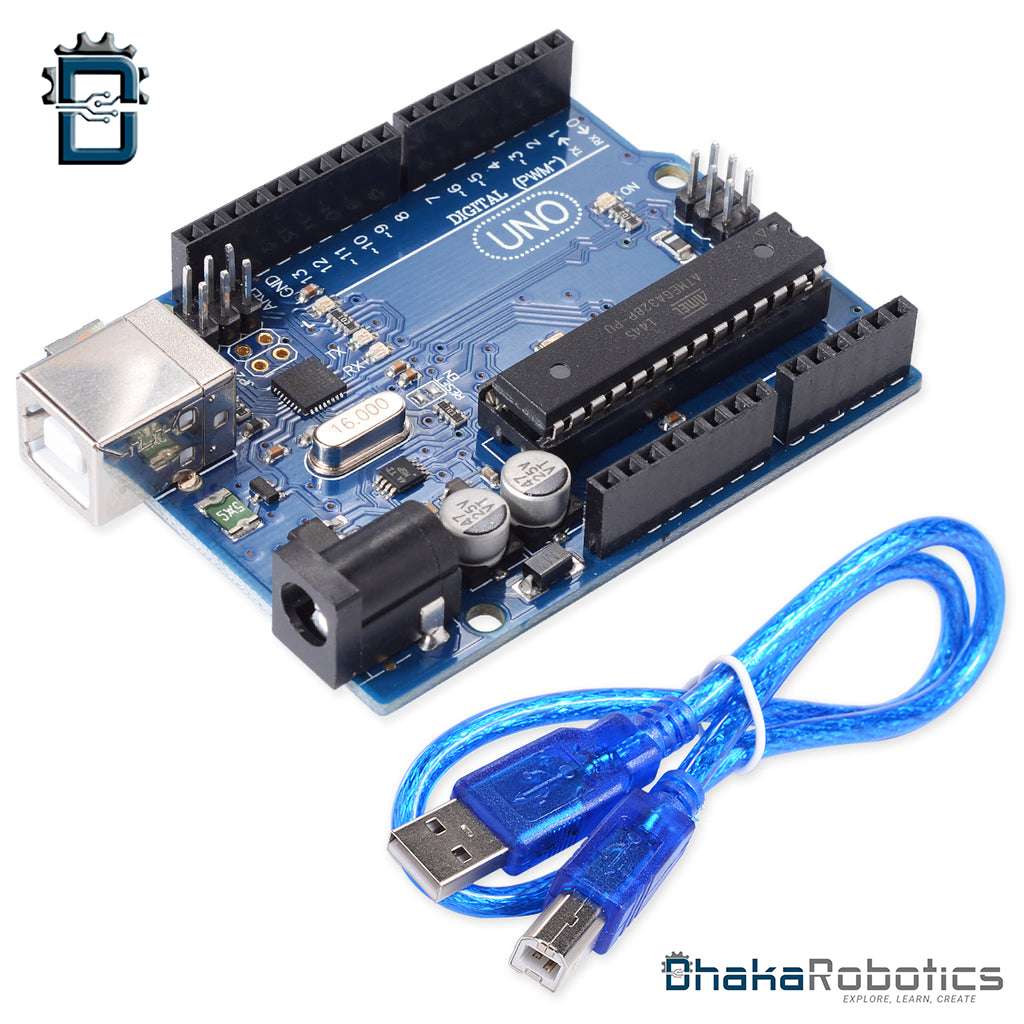
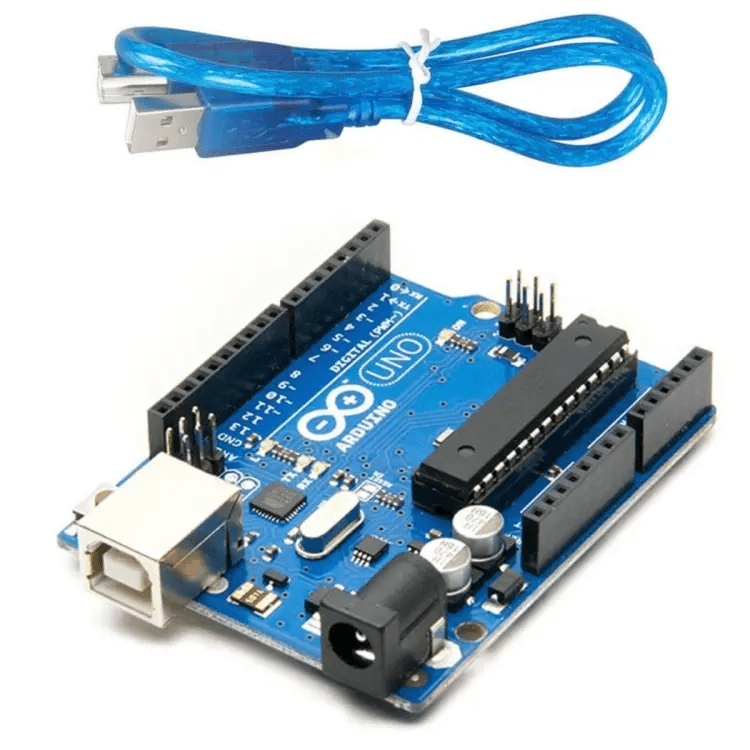
The Arduino Uno R3 Standard-Quality Edition
- Micro-controller: ATmega328
- Operating Voltage: 5V
- Input Voltage (recommended) : 7-12V.
- Digital I/O Pins: 14 (of which 6 provide PWM output).
- Analog Input Pins: 6
50 in stock
Arduino Uno R3: Standard Quality at an Affordable Price
The Arduino Uno R3 is a staple in the world of microcontrollers, known for its versatility and ease of use. The economic variant of the Arduino Uno R3 incorporates all the fundamental features and functionalities of its original counterpart while addressing the needs of budget-conscious individuals, educational institutions, and hobbyists. Designed with a focus on cost optimization, this variant offers an accessible entry point to the Arduino ecosystem without compromising on quality or reliability.
The economic Arduino Uno R3 boasts the following key features:
- ATmega328 Microcontroller: The heart of the Arduino Uno R3 is the ATmega328 microcontroller, which provides ample processing power for a wide range of projects.
- Digital and Analog I/O: With 14 digital input/output pins and 6 analog inputs, the Arduino Uno R3 economic variant offers plenty of connectivity options for interfacing with sensors, actuators, and other electronic components.
- USB Interface: The onboard USB interface allows for easy programming and communication with a computer, making it a breeze to upload code and interact with the microcontroller.
- Compatibility: The economic variant is fully compatible with the Arduino software and can be programmed using the Arduino IDE, ensuring a seamless transition for users familiar with the original Arduino Uno R3.
- Expandability: Like its original counterpart, the economic variant can be expanded with shields and modules to add additional functionality, making it suitable for a wide range of applications.
Key Features of Arduino Uno R3:
| Specification | Value |
|---|---|
| Analog I/O Pins | 6 |
| Clock Speed | 16 MHz |
| Color | Blue |
| DC Current per I/O Pin (mA) | 50 |
| Digital I/O Pins | 14 (of which 6 provide PWM output) |
| EEPROM | 1 KB (ATmega328) |
| Flash Memory | 32 KB |
| Input Voltage (Recommended) | 7-12V |
| Operating Voltage (VDC) | 5 |
| PWM Output Pins | 6 |
| SRAM | 2 |
| Weight (gm) | 26 |
| Made in Country | China |
| Arduino Software | Compatible |
Arduino Uno R3: A Popular Board for Building Interactive Projects
Arduino is an open-source electronics platform based on easy-to-use hardware and software. It’s designed for anyone interested in creating interactive projects. To burn bootloader on Arduino, you will need an AVR-ISP (in-system programmer) or another Arduino board. The process involves connecting the programmer to the ICSP header on the Arduino board and using the Arduino IDE to burn the bootloader.
When it comes to coding Arduino, you can use the Arduino IDE, which is a cross-platform application written in Java. It’s used to write and upload programs to Arduino compatible boards, but you can also use other programming languages like C or C++.
Making a quadcopter using Arduino Uno involves using the Arduino board to control the quadcopter’s motors and sensors. You can build a quadcopter from scratch or use a DIY kit that includes all the necessary components.
With Arduino, you can do a lot of things such as building robots, creating interactive art installations, making home automation systems, and much more. The Arduino Uno is one of the most popular and widely used Arduino boards. It’s based on the ATmega328P microcontroller and has 14 digital input/output pins, 6 analog inputs, a 16 MHz quartz crystal, a USB connection, a power jack, and more. You can write Arduino code using the Arduino IDE, which provides a simple and easy-to-use interface for writing and uploading code to the Arduino board.
To add the ESP8266 library in Arduino, you can use the Library Manager in the Arduino IDE. Simply open the Library Manager, search for “ESP8266,” and click the “Install” button. Adding NodeMCU in Arduino IDE involves installing the NodeMCU boards package using the Boards Manager in the Arduino IDE. Once installed, you can select NodeMCU as your board in the Arduino IDE and start writing code for it. Connecting an ESP8266 WiFi module to an Arduino Uno can be done using serial communication. You can use the SoftwareSerial library to create a virtual serial port on pins 2 and 3 of the Arduino Uno and communicate with the ESP8266 module. To connect an ESP8266 WiFi module with Arduino, you will need to establish a serial communication between the two using AT commands. This allows you to send and receive data between the Arduino and the ESP8266 module over WiFi.
Connecting an L293D motor driver with Arduino involves connecting the input pins of the L293D to the output pins of the Arduino that will control the motor driver. You will also need to connect the motor to the output pins of the L293D and provide power to the motor driver. To install the Arduino IDE, you can download it from the official Arduino website and follow the installation instructions for your operating system.
Making an Arduino Uno at home involves sourcing all the necessary components such as the ATmega328P microcontroller, quartz crystal, capacitors, resistors, LEDs, and other components. You will also need to design a PCB layout and solder all the components onto a prototyping board following the Arduino Uno schematic. Overall, Arduino is a versatile platform that allows you to create a wide range of projects from simple blinking LED lights to complex robotics and automation systems.

Reviews
There are no reviews yet.